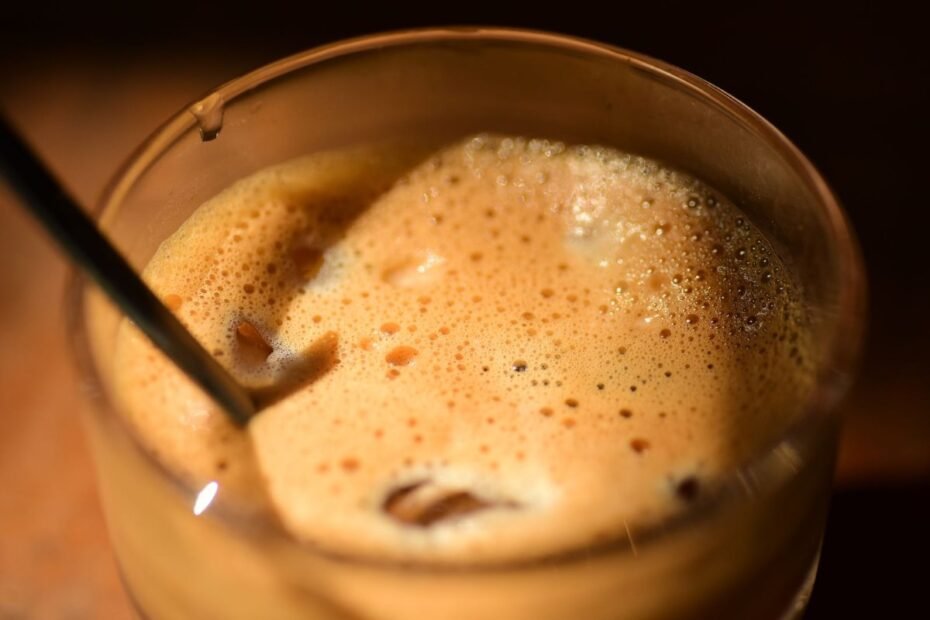
Cold foam is a light, airy layer of cold milk or cream that sits on top of iced coffee drinks. It adds a creamy texture without requiring a lot of milk, and it can be flavored with simple ingredients such as vanilla, cocoa, or cinnamon.
The best part is that cold foam does not require a steam wand. With a handheld frother, a jar, a French press, or a blender, you can make a simple version at home in a few minutes. It pairs well with an iced coffee, a cold brew, or an iced latte.
What Is Cold Foam?
Cold foam is cold milk, or a milk-based mixture, that has been aerated to create a layer of small bubbles. Unlike steamed milk, it stays cold and is designed for chilled drinks. It can be spooned or poured over iced coffee, cold brew, iced lattes, iced mochas, and other chilled coffee drinks. As you sip, the foam gradually mixes with the drink, which gives a different texture from simply adding cold milk.
Cold Foam vs. Regular Milk
Regular cold milk adds creaminess, but it stays liquid. Cold foam has been aerated, so part of the mixture becomes lighter and thicker. The amount of air you incorporate decides whether the result is loose and pourable or thick enough to sit on top of the drink. There is no single required recipe: some versions use plain milk, while others add cream, sweetener, or flavorings.
What Kind of Milk Works?
Start with cold dairy milk for a simple version. Cream can create a richer and thicker foam, although it can also give a heavier result. Plant-based milks can be used too, but results vary a lot from one product to another. Some foam easily, while others stay thin or collapse faster. The important point is that cold foam is made with cold milk or cream. This is not a method for turning hot milk into foam.
Easy Cold Foam Base Recipe
A simple base gives you something to adjust to taste.
Basic Cold Foam
For roughly one or two drinks:
- 120 ml (about ½ cup) cold milk
- 1-2 teaspoons sweetener, optional
- ½ teaspoon vanilla extract, optional
Use plain milk for a neutral foam, and add the sweetener and vanilla for a flavored version. The exact amount of foam depends on the milk, the equipment, and how much air you incorporate.
Before You Start
- Keep the milk refrigerated until you are ready to make the foam.
- If you use dairy milk, discard it if it smells or tastes off instead of using it in a recipe.
- Keep everything cold, including the container when practical.
Four Ways to Make Cold Foam Without Special Equipment
Different methods create slightly different textures. The best choice is often simply the equipment you already have in the kitchen.
| Method | Texture | Effort | Best for |
|---|---|---|---|
| Handheld frother | Light and airy | Low | Quick single servings |
| Jar shake | Loose to medium foam | Low | No special equipment |
| French press plunger | Fine, airy foam | Moderate | Larger batches |
| Blender | Thick and uniform | Moderate | Multiple servings |

1. Handheld Frother
A handheld frother is one of the simplest options.
- Pour 120 ml cold milk into a tall container.
- Add sweetener or flavoring if you like.
- Insert the frother just below the surface.
- Froth for roughly 15-30 seconds, until the milk has visibly increased in volume and looks light and airy.
- Let it sit for a few seconds before pouring.
Avoid filling the container close to the top, because the mixture expands as air is incorporated. If the foam turns extremely stiff, the milk has probably been aerated more than needed for a pourable topping.
2. Jar Shake
The jar method is useful when you do not have a frother.
- Start with a clean jar that is large enough to leave plenty of empty space.
- Pour in cold milk, filling the jar only partway.
- Add sweetener or flavoring if you like.
- Secure the lid tightly.
- Shake vigorously until the volume increases and foam forms.
- Open the jar and let the foam settle slightly, then spoon or pour it over your iced coffee.
Safety note: never put hot liquid into a sealed jar. For cold foam, use cold milk only, and do not fill the jar to the top, because the milk needs room to expand while you shake. The foam may be somewhat less uniform than foam made with a frother, but it still makes a pleasant topping.
3. French Press Plunger
A French press can double as a simple foam-making tool, and you may already own one if you follow our French press guide.
- Add cold milk to the French press, keeping the level well below the maximum.
- Add any sweetener or flavoring.
- Place the lid and plunger on top.
- Move the plunger up and down repeatedly until the milk becomes noticeably lighter and foamy.
- Pour or spoon the foam onto the drink.
Use relatively small batches so the milk has room to move. The plunger can create a fine texture, although the exact result depends on the French press and the amount of milk.
4. Blender
A blender can produce a thicker, more uniform foam, especially when you are making several servings.
- Add cold milk to the blender.
- Add sweetener or flavoring if you like.
- Secure the lid.
- Blend briefly until the milk becomes foamy, and stop once it reaches the consistency you want.
- Pour immediately over the iced drink.
Safety note: never blend hot liquid in a sealed blender. Cold foam should be made with cold milk only. Do not fill the container too far, leave plenty of room for expansion, and follow the blender’s own operating instructions. For a single drink a blender may be more equipment than necessary, but for several servings it can be convenient.
Cold Foam Variations
Once the base recipe works, small changes create several different styles.
Vanilla Cold Foam
Add about ½ teaspoon vanilla extract to 120 ml of cold milk. For a sweeter version, add 1-2 teaspoons of sweetener and adjust to taste. The vanilla should support the coffee rather than cover it, but the ideal level of sweetness is personal.
Cocoa Cold Foam
Add about 1 teaspoon unsweetened cocoa powder to the milk. Cocoa powder can clump, so mix it into the cold milk before frothing. A small amount of sweetener can help if the cocoa tastes too bitter for your preference. It works nicely on a mocha.
Cinnamon Cold Foam
Add a small pinch of ground cinnamon to the milk before frothing. Cinnamon can be strong, so a little goes a long way, and the flavor becomes more noticeable as the foam mixes with the coffee.
Sweet Cream-Style Foam
For a richer topping, replace part of the milk with a little cream. For example:
- 90 ml (about 3 fl oz) cold milk
- 30 ml (about 1 fl oz) cold cream
- 1-2 teaspoons sweetener
- Optional vanilla
Froth until the mixture is airy but still pourable. The result should be richer than basic milk foam without becoming so thick that it behaves like whipped cream.
How to Put Cold Foam on Iced Coffee
Cold foam works best when the drink is already prepared and chilled.

- Prepare your iced coffee, cold brew, or iced latte.
- Fill the glass with ice, leaving some space at the top for the foam.
- Prepare the cold foam separately.
- Pour the foam gently over the surface.
- Add a light dusting of cinnamon or cocoa if you like.
For a layered look, pour slowly over the back of a spoon or directly onto the surface. The foam will gradually settle and mix with the coffee, which is normal. If the foam is too dense to pour easily, spoon it onto the drink instead.
Troubleshooting Cold Foam
Cold foam can be sensitive to the type of milk, the amount of air, and the mixing method.
Why Is My Foam Too Thin?
- Not enough air was incorporated.
- The milk was not cold enough.
- The mixture was not frothed for long enough.
- The particular milk does not foam easily.
- Too much flavoring or other liquid was added.
Try starting with colder milk and incorporating air a little longer. If you use plant-based milk, remember that results vary considerably between types.
Why Does My Foam Collapse Quickly?
Some foam naturally settles over time. If it collapses almost immediately, try starting with colder milk, using less added liquid, frothing slightly longer, serving right after preparing it, and avoiding excessive shaking or blending. The goal is not necessarily foam that stays perfectly separate for a long time, because cold foam is meant to gradually become part of the drink.
Why Is My Foam Too Thick?
If the foam looks more like whipped cream than a pourable topping, it has probably been aerated too aggressively or contains too much cream. Try reducing the frothing time or using a higher proportion of milk. For an iced latte, a lighter foam is generally easier to incorporate.
Why Is the Foam Full of Large Bubbles?
Large bubbles usually point to uneven aeration. Try gentler, more controlled frothing. With a handheld frother, keeping the whisk just below the surface helps incorporate air without creating too many large bubbles.
Storing Cold Foam
Cold foam is best used shortly after it is made. The texture changes during refrigeration, and the foam can lose volume as the air escapes, so making only the amount you need is usually the simplest approach.
If you must refrigerate a prepared milk mixture for a short time, keep it properly chilled in a covered container and use normal food-safety judgment. Discard dairy milk if it smells or tastes off, and do not leave dairy-based foam at room temperature for extended periods. If the mixture separates in the fridge, gently remixing or re-frothing may improve the texture, although it may not return to exactly the same consistency.
FAQ: Cold Foam at Home
Can I make cold foam with regular milk?
Yes. Cold dairy milk is a simple starting point for homemade cold foam. The final texture depends on the milk and the amount of air incorporated.
Can I use plant-based milk for cold foam?
Yes, but results vary. Some plant-based milks create more stable foam than others, so you may need to adjust the frothing method and time.
Can I make cold foam ahead of time?
It is generally best shortly after preparation, because the foam gradually loses air and changes texture. If you refrigerate a milk mixture, keep it cold and discard dairy milk if it smells or tastes off.
Why does my cold foam disappear into the coffee?
A lighter foam naturally mixes into the drink, especially when poured rather than spooned. For a thicker layer, incorporate a little more air or use a richer milk mixture.
Can I use a blender to make cold foam?
Yes, as long as you use cold milk or cream only. Never put hot liquid into a sealed blender, and fill the container only partway.
Can I make cold foam without a frother?
Yes. A jar, a French press plunger, or a blender can all be used to aerate cold milk. Each method produces a somewhat different texture.
Final Thoughts
Cold foam is a simple way to change the texture of an iced coffee without turning it into a much milkier drink. Start with cold milk, keep the mixture lightly aerated, and adjust the sweetness or flavor to suit the coffee underneath. Once the basic method feels comfortable, vanilla, cocoa, cinnamon, and sweet-cream-style versions are easy variations to try.
